Batteries don’t last forever, it’s just a fact of life. As you know batteries are used to power different devices, including laptops. Just like your TV remote batteries, they do not have an infinite life. With prolonged usage batteries will eventually wear and degrade. Since the main advantage of a laptop is it’s portability it would not be a bad idea to check your battery’s health. Continue reading to learn more about checking your batteries.
Why and How Do Laptop Batteries Die?
The laptop is supposed to be portable, and that means if you can’t move with it from one place to another with ease, the machine will not be serving you accordingly. The laptop battery is manufactured such that it will wear out over time, especially if you practice bad charging habits.
If you continue to ensure the battery is fully charged, it will lose its efficiency with time. Even if you are charging the battery partially, it will still lose its efficiency. You should fully discharge the battery, then recharge it to maximize your battery life. Focus on checking the laptop battery health. As you monitor it, you will have a better idea of the amount of wear and tear that the battery is under.
So, how do you check the battery health of your laptop? There are steps that you should follow to check the laptop battery health, depending on the type of laptop that you are currently using.
How to Check the Battery Health on the PC Laptop
Use the PowerShell Terminal on Windows.
You are supposed to input one command from the PowerShell terminal. Try the following these steps:
Start by right-clicking the start menu.
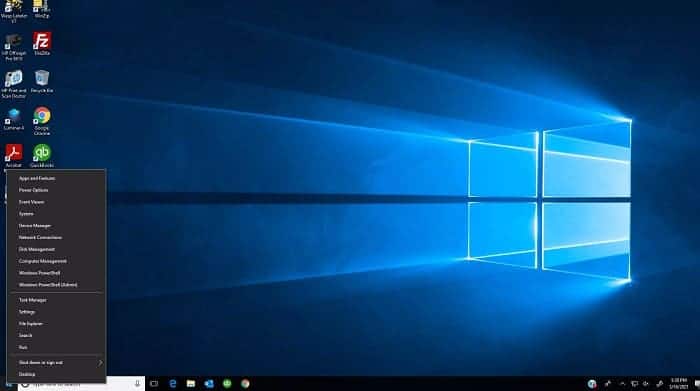
Search for Windows PowerShell (Admin) and click on that option.
After the PowerShell appears, type in this command: “powercfg /batteryreport” without the quotes
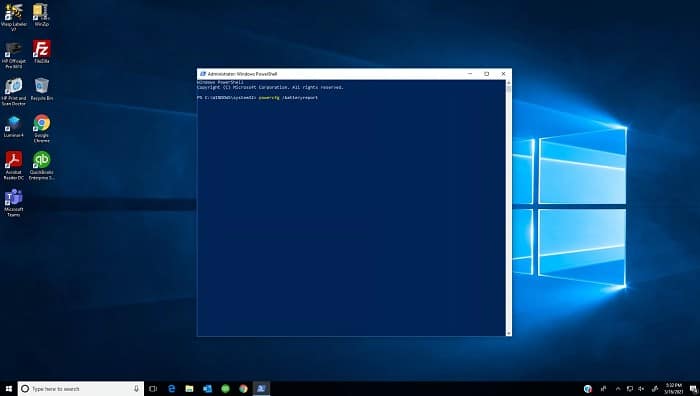
Press the Enter key, and the prompt will tell you where your report has been saved to.
You can also search for CMD instead of PowerShell after clicking on the start icon.
The procedure is still the same as when you are using Command Prompt; however, you should run the command prompt in administrator mode.
Following the instructions listed above, you will get a report that includes a lot of information about the laptop and battery health. The report comes in the form of an HTML file, and you are supposed to double-click so that you can view the present content. You will scroll down through the report, and you will learn more about your laptop’s battery health. There will be sections on Full Charge Capacity, Design Capacity, and Cycle Count.
The stats you’ll want to check most closely are Full Charge Capacity and Design Capacity. A large difference in these two numbers will indicate that the battery life is no longer what it was originally designed to be.
There will also be information on the battery life estimates, and you will get a clear picture of the amount of time the battery will last. The information will ensure you have an understanding of where the laptop battery is with reference to the life cycle.
Hi, My name is Josh Giesing. I am the President at Computer PRO Unltd. In my free time, I enjoy reading and have a passion for learning.